Quick answer
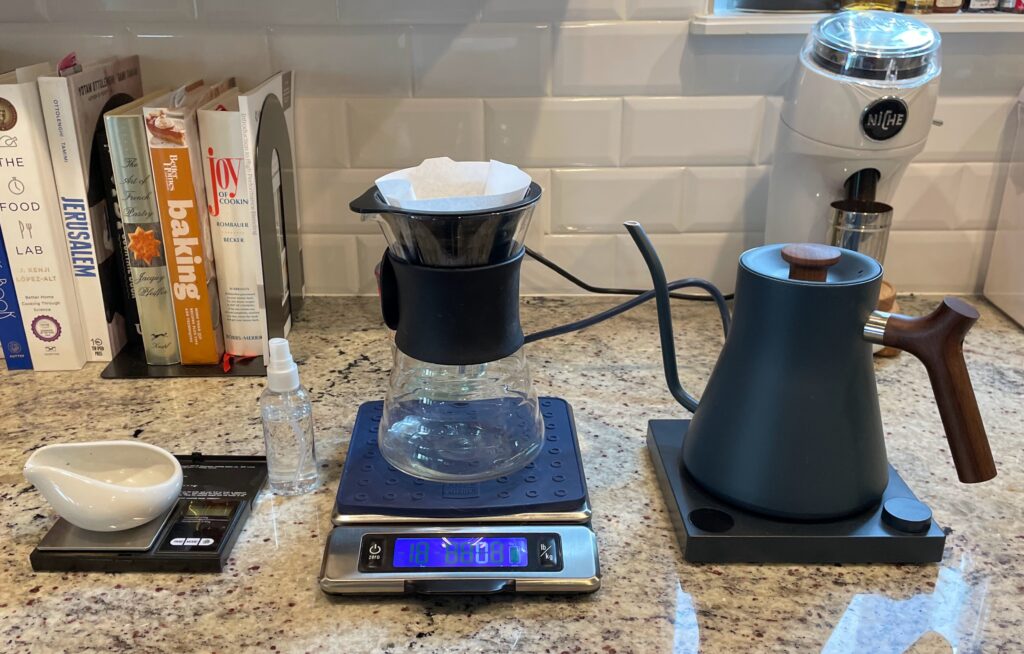
For drip coffee or pour-over, start around 1:17 by weight: 1 gram of ground coffee for every 17 grams of brewing water. That means approximately 15 g coffee for 250 g water, 29 g for 500 g, or 59 g for 1 liter. Treat this as a starting recipe, not a universal optimum; Hario’s V60 guidance includes ratios from 1:15 to 1:17. (hario.co.uk)
Formula: coffee needed in grams = brewing water in grams ÷ ratio number.
Before calculating a full pot, check your brewer’s capacity in milliliters or liters. A machine’s “cup” is not necessarily a US measuring cup—or your drinking mug. (support.moccamaster.com)
1. How to read a coffee-to-water ratio
A ratio written 1:17 means one part dry coffee to 17 parts brewing water, measured by weight. For a filter-coffee recipe, the water number describes the water used to brew, not the finished drink collected below the filter. Hario’s 15 g coffee and 250 g water recipe, for example, works out to approximately 1:16.7. (hario.co.uk)
Use either of these calculations:
- Know your water amount? Divide it by the ratio number to find the coffee dose.
- Know your coffee dose? Multiply it by the ratio number to find the water amount.
At 1:17:
- 340 g water ÷ 17 = 20 g coffee
- 30 g coffee × 17 = 510 g water
Keep both sides in grams. Don’t divide fluid ounces of water by grams of coffee.
For the same water amount, a smaller second number means more coffee. With 300 g water, 1:15 uses 20 g coffee, while 1:18 uses about 16.7 g. That makes the direction of an adjustment easier to remember: move toward 1:15 for a more coffee-heavy recipe, not toward 1:18.

2. Why a brewer “cup” is not your mug
“Cup” is an unreliable recipe unit unless the volume is defined.
A US customary measuring cup is 8 US fluid ounces, approximately 237 mL. But manufacturers use other definitions. Moccamaster’s published brewing chart lists 10 cups as 1.25 liters, making each marked cup 125 mL. The brewing instructions for OXO’s Barista Brain 9-Cup Coffee Maker describe a cup as 5 fluid ounces and explicitly say that two machine cups equal one mug. These definitions belong to those documents, not every machine from either brand. (support.moccamaster.com)
For your brewer:
- Find the exact model’s manual.
- Look for reservoir capacity in liters, milliliters or fluid ounces.
- Identify the water volume represented by the fill line you use.
- Calculate the coffee dose from that water amount.
For your mug, place it on a scale, zero the scale, then fill it with water to your preferred drinking level. Record that amount as a serving target, not automatically as your brewing-water amount: the brewing process retains some water in the grounds. (producthelp.kitchenaid.com)
3. A coffee-ratio table for mugs and shared pots
Use this table as a calculation aid for drip coffee or pour-over. The middle column is the article’s 1:17 starting point; the other columns show nearby recipes to compare.
Every water amount below is brewing input—not guaranteed beverage yield. Water volumes and US equivalents are approximate, and coffee doses are rounded to practical whole grams.
| Brewing water | Approximate US volume | Coffee at 1:17 | Coffee at 1:16 | Coffee at 1:18 |
|---|---|---|---|---|
| 237 g / 237 mL | 8 fl oz / 1 measuring cup | 14 g | 15 g | 13 g |
| 250 g / 250 mL | 8.5 fl oz | 15 g | 16 g | 14 g |
| 300 g / 300 mL | 10.1 fl oz | 18 g | 19 g | 17 g |
| 350 g / 350 mL | 11.8 fl oz | 21 g | 22 g | 19 g |
| 500 g / 500 mL | 16.9 fl oz | 29 g | 31 g | 28 g |
| 750 g / 750 mL | 25.4 fl oz | 44 g | 47 g | 42 g |
| 1,000 g / 1 L | 33.8 fl oz | 59 g | 63 g | 56 g |
| 1,250 g / 1.25 L | 42.3 fl oz | 74 g | 78 g | 69 g |
| 1,500 g / 1.5 L | 50.7 fl oz | 88 g | 94 g | 83 g |
These are mathematical recipe options, not claims that every brewer can accommodate every dose. Respect your machine’s water and coffee limits. OXO’s instructions, for example, specify filling between the minimum and maximum reservoir markings. (oxo.com)
4. Brewing water and finished coffee are different amounts
Putting 500 g of water into a brewer does not mean you will collect 500 g of coffee.
Some water remains in the spent grounds. A brewer can also lose water through steam or retain it internally. KitchenAid identifies these factors in its explanation of lower-than-expected coffee output. Its numerical example is equipment-specific, so it should not become a fixed loss allowance for every home recipe. (producthelp.kitchenaid.com)
To plan servings without guessing:
- Record the coffee dose and brewing-water amount.
- Brew normally.
- Weigh the finished coffee in a suitable heat-safe vessel, subtracting the vessel’s weight.
- Record how many of your usual servings that batch provides.
For the next batch, use that observation to plan the quantity while preserving your chosen ratio.
Also separate rinsing water from brewing water. If you rinse a pour-over filter and discard the rinse, zero the scale again before adding the measured brewing water. Hario’s method follows that sequence. (hario.co.uk)
5. Worked example: coffee for one small mug
Suppose you want to start with 250 g of brewing water, about 8.5 US fluid ounces.
At 1:17:
250 ÷ 17 = 14.7 g coffee
Round that to 15 g. The resulting recipe is approximately 1:16.7, matching Hario’s published single-cup V60 recipe.
For that specific method:
- Use 15 g medium-ground coffee and 250 g water.
- Set the water temperature to 92–94°C / 198–201°F.
- Rinse the filter, discard the rinse and add the grounds.
- Zero the scale.
- Pour 45 g water to wet the coffee, then wait 30–45 seconds.
- Continue pouring in stages until the scale reads 250 g total.
- Use 2½–3 minutes as Hario’s target total brewing time. (hario.co.uk)
The finished drink will be smaller than the water input. If that leaves your preferred mug too empty, increase both coffee and water proportionally next time rather than adding extra brewing water to the same dose. (producthelp.kitchenaid.com)
6. Worked example: coffee for a shared drip pot
Suppose your brewer’s manual identifies the fill line you want as 1.25 liters.
Using approximately 1,250 g water at 1:17:
1,250 ÷ 17 = 73.5 g coffee
Round to 74 g, provided that dose is within your brewer’s instructions and basket capacity.
Then:
- Fill the reservoir with the measured water amount, without exceeding its maximum.
- Install the correct filter and add the weighed coffee.
- Select the appropriate batch-size setting if the machine has one.
- Brew, then check whether the finished quantity covers your planned servings.
Batch settings can matter: OXO’s 9-Cup manual says its selected cup range adjusts brewing time. Don’t assume a small-batch setting is interchangeable with a full-pot setting. (oxo.com)
A manufacturer’s starting dose may differ from this article’s table. Moccamaster’s published chart, for example, pairs 1.25 liters with approximately 69 g coffee, rather than 74 g. That is a different starting recipe, not a calculation error. Begin with your model’s guidance if uncertain, then compare nearby doses by taste. (support.moccamaster.com)
7. Keep immersion and espresso ratios separate
French press and other immersion methods: use a method-specific recipe rather than assuming a drip recipe is automatically ideal. Little Waves Coffee Roasters’ French press guide uses 1:14–1:16 coffee to poured water, coarse grounds and a 4–6-minute brewing window. (littlewaves.coffee)
For a 1:15 immersion calculation:
450 g water ÷ 15 = 30 g coffee
That is a recipe calculation, not a guarantee of 450 g finished coffee. Check your press’s fill instructions before choosing the batch size.
Espresso: the second number normally means finished espresso weight, not reservoir water. La Marzocco defines espresso brew ratio as ground-coffee weight compared with liquid espresso in the cup. Its example of 18 g coffee producing 36 g espresso is 1:2. (home.lamarzoccousa.com)
The distinction is essential:
| Method | What the second ratio number represents |
|---|---|
| Drip or pour-over | Brewing-water input |
| French press recipe described above | Poured-water input |
| Espresso | Finished beverage output |
Don’t put a 1:2 espresso ratio into the filter-coffee formula and expect a normal mug of coffee.
8. Adjust strength without changing everything at once
First describe the problem: is the coffee too concentrated or too dilute, or is its flavor sour, harsh or drying? Those are different troubleshooting questions. Little Waves’ guide separates weak or strong coffee from sour or bitter coffee, recommending ratio adjustments for the former and grind adjustments for the latter. (littlewaves.coffee)
For a controlled comparison, keep the water amount fixed:
- Too dilute? Try a little more coffee—for example, move from 1:17 to 1:16.
- Too concentrated? Try a little less—for example, move from 1:17 to 1:18.
- Sour or bitter despite a sensible dose? Keep the ratio steady while testing a grind adjustment appropriate to your method. (littlewaves.coffee)
With 500 g water, those ratio trials are approximately 29 g, 31 g and 28 g coffee, respectively.
Before blaming the ratio, check:
- Units: grams and fluid ounces are not interchangeable.
- Cup definitions: use actual water volume, not an assumed mug count.
- Input versus output: don’t calculate a drip dose from the finished drink by accident.
- Measurement: weigh the dose rather than inventing a universal grams-per-scoop conversion.
- Capacity: stay within the brewer’s water and coffee limits.
- Consistency: change one variable and write it down.
A useful recipe note is simply: method, coffee dose, water amount, grind setting, batch setting and what you would change next. Once you find a recipe you enjoy, the same ratio formula lets you scale it without starting over.